From Cigar Box to Pochade Box
Plein Air painting can be quite the challenge, especially when you find yourself lugging around what feels like double your body weight in art supplies, including those hefty and somewhat cumbersome French easels. They can be a bit like s bit of hassle to put together and take apart every time, not mentioning that you need a 5 feet radius around you. I’m mostly joking about the French easels, well… maybe not entirely and this is why is a good idea to have a smaller pochade box.
In 2016, I decided to simplify things by creating a compact and lightweight paint/sketch box, a pochade box. I needed something that I could easily toss into my backpack for quick oil studies and sketches during hikes or traveling, without having to lug around a ton of equipment. This led me to modify a cigar box into my very own mini portable art studio.
Here’s how I tackled the project:
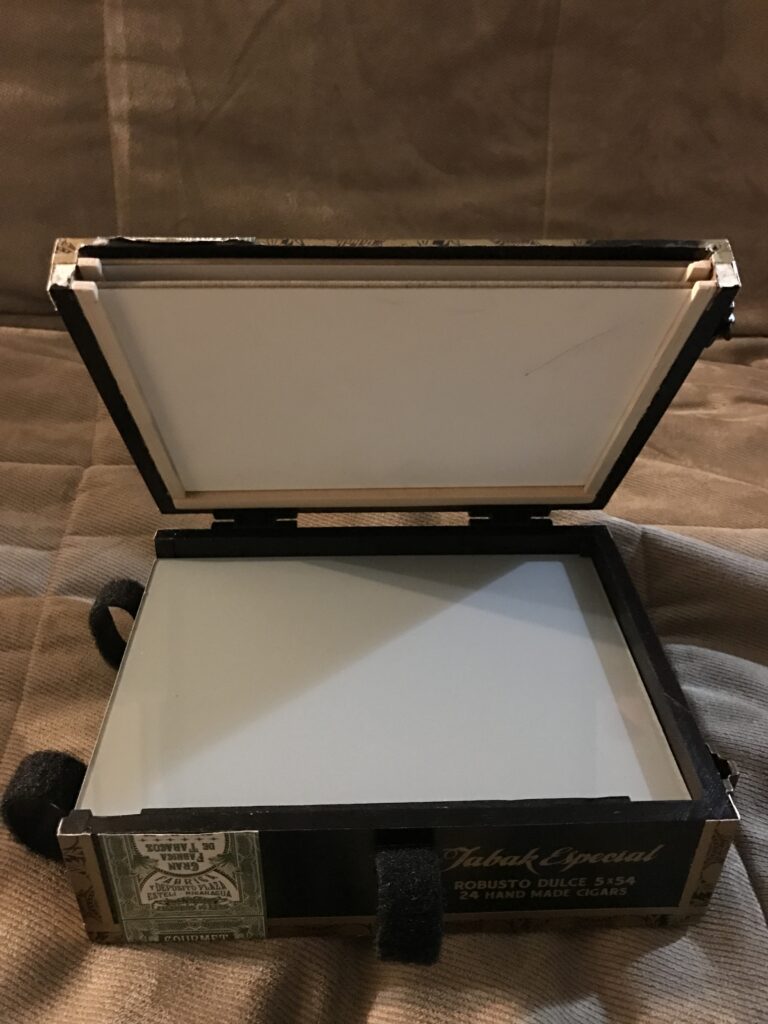
Finding the ideal cigar box wasn’t as simple as I expected. After visiting several cigar shops without much success, I turned to Craigslist. Fortunately, I stumbled upon a listing where someone was selling a bunch of cigar boxes at an incredibly affordable price. I snagged about 10 of them for roughly $1.50 each. Among the lot, I found the perfect candidate: a sturdy Tabak Especial Robusto box, made by Drew Estate. It’s a really well made wooden box and it works perfectly for my purpose.
Materials used:
(My posts contains affiliate links! If you buy something through one of those links, you don’t pay a penny more, but I’ll get a small commission, which helps keep the lights on. Thanks!)
- -2 Adjustable torque hinges
- -Rare earth magnets
- -Rubber feet
- -D-Ring
- -Basswood strips
- -Standard tripod size T-nut
- -Black spray paint
- -Black spray paint or N6 acrylic paint
- Glass
Tools:
Tripod:
- Peak Design Travel Tripod (my everyday tripod)
The Lid: I cut out a portion piece of the front of the lid using my Dremel, at the moment seemed to be the best tool I had for the job. By doing this, I created a slot for sliding painting panels in the inside of the lid, which I secured with two thin basswood strips on each side of the interior. As a result, this now allows me to carry two wet panels of 6″x8″ at the same time while keeping the lid shut. Velcro helped keep the lid closed during travel and prevented wet painting panels from slipping out.


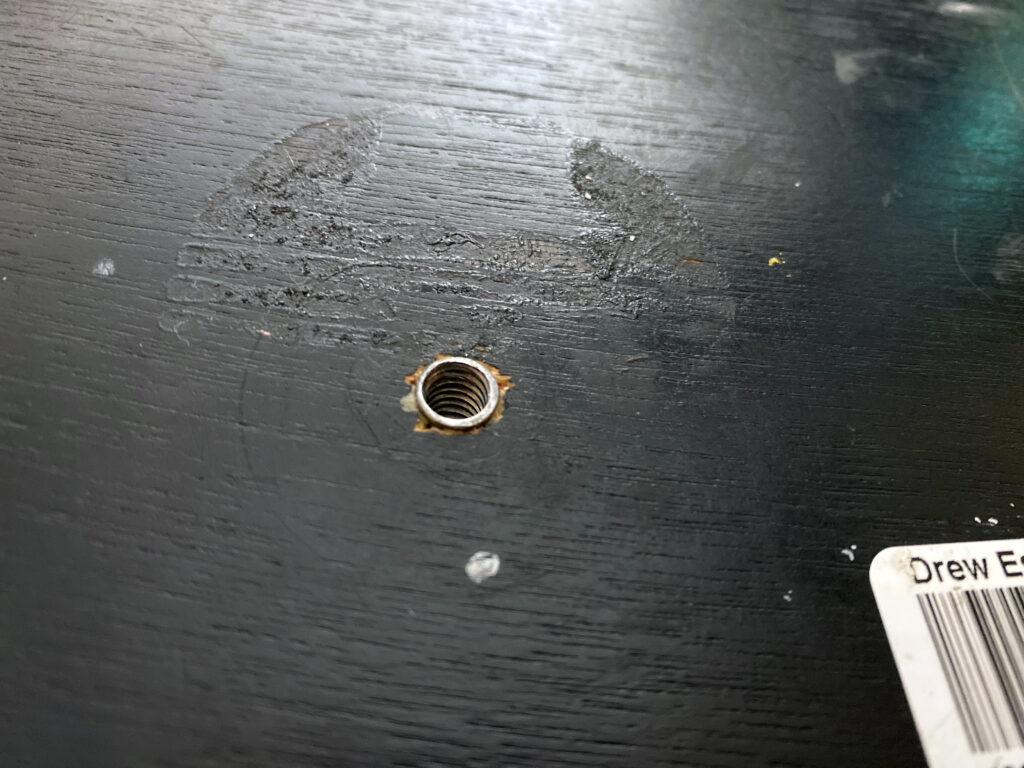
The Body: To modify the box, I first glued a small piece of plywood to the inside of the box where the T-nut would be placed. Then drilled a hole for the 1/4″ T-nut in the center of the bottom of the cigar box, drilling through the plywood piece. Gently tap the T-nut into place from the inside of the box with a hammer, making sure it’s securely anchored.
The next step involved replacing the box’s hinges with friction or tension hinges, allowing the lid to stay open at any desired angle, effectively functioning as an easel. To do this, I simply closed the lid and used wood clamps to keep the lid and the body of the box in place as I removed the old hinges. Then I just mark where the new friction hinges are going and I install them.


I added anti-slide rubber feet to each bottom corner and attached rare earth magnets as well to the bottom of the box for holding palette knives and other metal tools. These magnets will securely hold your palette knives, keeping them readily accessible.
On the sides, I attached D-rings which provide a convenient spot to hang your my of Gamsol, ensuring it’s easy to reach. A strap could also be attached to these D-rings to carry my pochade box from my shoulder or to attach it to the outside of a backpack. The magnets also were placed on the right, bottom side of the cigar box as I’m right handed so I can access those easily. I would also hang my Gamsol container on the right side for the same reason.


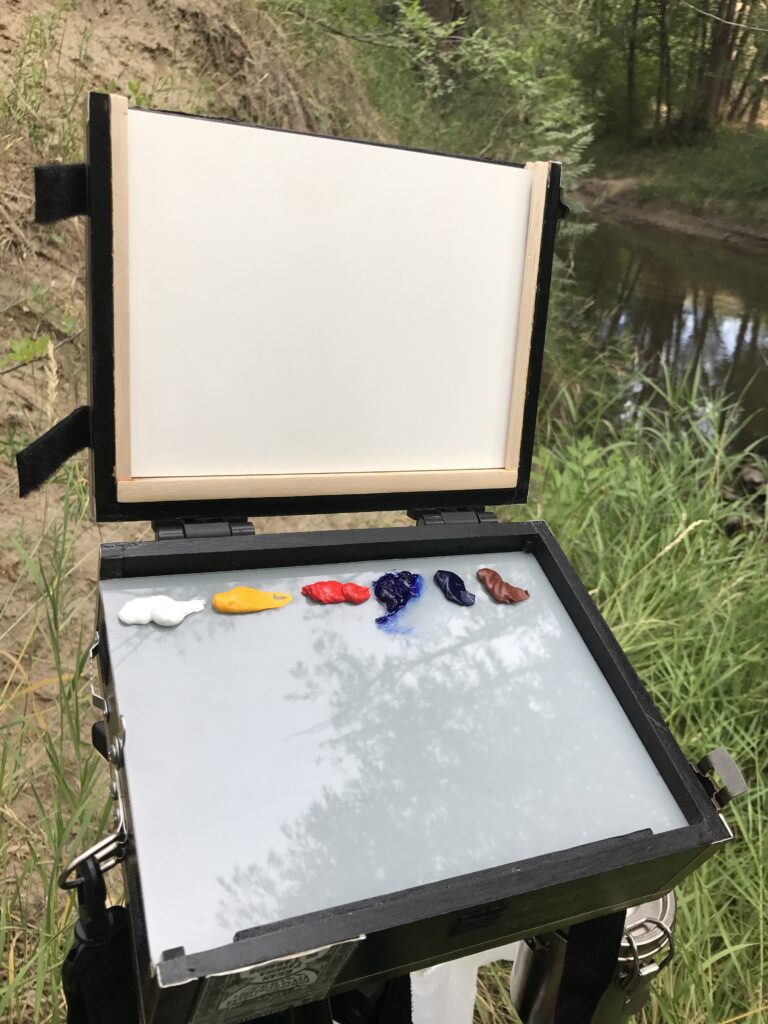
The Palette: I had the glass palette cut at Lowe’s Hardware and I spray painted the back with a neutral grey to have a toned palette. Acrylic paint can also be applied with a brush. Once the paint dried I applied some strips of packing tape on top of the paint to protect it from scratching off every time that I pull in and out the palette.
To attach the palette in I cut off about 1/4″ of the left side of the top of the body and I glued in small wooden strips along the top and bottom sides of the glass using wood glue, creating a lip that will hold the glass palette. The wooden strips allow me to slide the glass in and out of the body and it stays in place when I paint.
To keep the palette in place, believe it or not, I used part of a dog nail clipper… Yes, I know, but it did the job perfectly. When I need to pull out the palette, I just turn the little piece down and I turn it up once the palette is back in place. You can see this little piece on the left side of the box right above the D-ring.
Bellow the palette I was left with some storage room of about 8.5″x6.5″x2″ in which I can carry small tubes of paint as well as paint brushes and other containers, maybe even some folded up paper towels and latex gloves.


Your DIY cigar box / pochade box is now a versatile and portable artistic companion for outdoor adventures. With tension hinges, a glass palette, slots for wet paintings, magnets for palette knives, and a D-ring for your Gamsol jar, it offers a complete outdoor painting experience. Attach it to your tripod, set up your easel, and embark on plein air painting adventures with a personalized touch. Enjoy the freedom to create art wherever inspiration strikes!